
In Equify, there is two ways to generate customised documents :
👉 Within a transaction :
1️⃣ Add a new transaction and fill in the details of your transaction.
To learn more about creating a transaction check out this article.
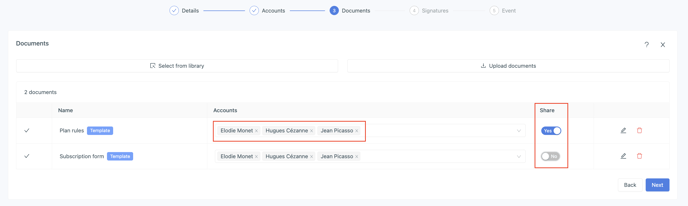
2️⃣ In the workflow, import one or more templates from your computer (DOCX format file) or select one or more from your Equify library
ℹ️ The blue Template badge indicates that you document has been identified as a template.

To customised your documents with fields, here is the list of the smartfields supported by Equify
3️⃣ Each template will be used to generate a custom document per Account Holder.
Ex: if I have filled-in 3 rows for 3 Account Holders in my transaction, and have selected two template documents, a total of 6 documents will be generated.
If you do not want to generate a document for every transaction, you can select which ones to exclude using the selector.
4️⃣ Finally, you can choose whether or not to share custom documents with their corresponding account holder. By ticking the Yes box, each account holder will be able to access their own custom document, account holders cannot access other account holders' custom documents or the template itself in any way.
5️⃣ At the signatures step, check the documents to sign and the account's informations.
6️⃣ Finalise the creation of your transaction.
By validating your transaction, the custom documents will be automatically generated and added to your library.
👉 From your Equify Library :
1️⃣ Select the template documents you wish to customise.
2️⃣ Use the "..." at the end of the line or the Templating button at the top right of the screen in case of a multiple selection to open the templating window.
3️⃣ Check that the identified smartfields match the objects they are linked to.
Ex: if you used the smartfield {Holder.name}, make sure that the property "name" has been associated with the object "holder".
4️⃣ Select the specific object concerned.
Ex: if your object is a transaction, select the one whose properties you want to use.
You can add as many rows as you like. For each row added, a document will be generated.
5️⃣ If your document has a signature tag, check the contact details of the signers before save.